Getting vocals to sit in a mix in an upfront yet natural way can be difficult when first learning how to mix vocals. Compression is a great way to bring a vocal forward in a mix but it can also cause unappealing sonic artifacts. The solution to this problem that many professional mixing engineers use on vocals is a process known as parallel compression.
I remember when i learned about parallel compression . Really changed my life
— engineeredbyxay (@XavierHasHits) May 12, 2019
Parallel compression involves minimally processing the main vocals and applying a more obvious compression to the same source on another track. You are then able to lightly blend in the overly compressed vocal with the natural sounding track.
This allows you to harness the power of a heavily compressed vocal in a way that isn’t easily noticed. It’s a useful technique but is often poorly executed by the beginner engineer. So, we’ve compiled a list of the best tips to consider when learning how to use parallel compression on your vocals.
1. Send or Duplicate?
There are two ways to set up your session to use parallel compression on the vocals.
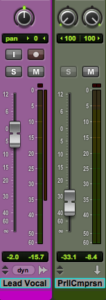
The first is to use an aux send to send the vocal to another track which has a compressor inserted on it. When using this method be sure to use a pre-fader send. If you use a post-fader send the parallel compression will be affected when changing the levels of the main vocal track.
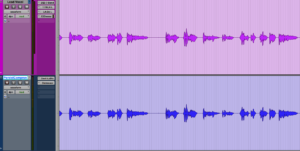
The second method is to duplicate the vocal regions and copy them to a second track for processing. Either method works well, find something that fits your workflow and go with that.
2. Subtly Aggressive
Usually when using parallel compression on vocals, you want to do so in an unobvious fashion. More often than not you’ll want to find a compressor that adds a unique or appealing characteristic to the vocals when heavily applied.
Because it’s so aggressive keep the fader low when blending and treat it as a form of EQ that can be subtly added in. In this scenario you’ll definitely notice when the parallel track is muted. However, once it’s in you’ll feel the difference more than you hear it. As with most effects, a little goes a long way.
3. Don’t Parallel Compress Vocal Breaths
Breathing is an important aspect of any vocal track that makes it sound natural and human. However, when overly compressing something it makes the breaths louder in a distracting way.
To avoid this problem, place a gate before the main compressor on your parallel track. Set it so that it only allows vocalists singing through and not the breaths. Alternatively, if you duplicated the vocals to a separate track for parallel compression, you can manually remove breaths.
4. Multiple Parallel Compressors
Many people think you should only parallel compress your vocals once. However, many pros will send their vocals to several separate channels, using a unique compressor on each.
This goes back to the idea of using parallel compression as a form of EQ. Each channel brings out its own unique characteristics and you are then able to blend between multiple for the prefered vocal tone.
5. Compress A Vocal Double
Rather than send the same vocal to another track for parallel compression, another technique is to use a vocal double. Have your vocalist sing the same lead line on a second track and compress that heavily while only lightly compressing the main vocals.
You may want to only bring the double in for certain parts of the song such as the chorus. This can help thicken the vocal and make it stand out during more dense arrangements.
6. EQ Your Compression
Often when using parallel compression you may only want to bring out certain frequencies. This is because parallel compression can sometimes amplify problem frequencies in the vocals that you don’t want to hear.
The solution is to add an equalizer plugin either before or after the compressor plugin. You can then notch out offensive frequencies or boost those that enhance the sound. Keep in mind that placing an EQ before the compressor will affect how if reacts to the sound coming into it.
7. De Essing The Compression
Intense parallel compression will often bring out the vocal sibilance in an obtrusive way. This is often why beginner engineers have trouble using parallel compression.
To avoid this insert an extremely aggressive de esser before the parallel compressor. You can be way more harsh than you normally would as the main vocal will provide all the sibilance. By doing this your parallel compression will only enhance the body of the vocals.
8. Use The Mix Knob
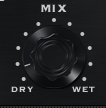
Sometimes you’ll want to quickly add parallel compression without going through the hassle of routing the vocals to another channel. To quicken your workflow and creativity when mixing, many compressors include a “mix” knob for this reason.
Using it blends between the dry signal and compressor’s output. This lets you parallel compress by just placing the compressor on the main vocal track.
Although this allows for quicker mixing, it comes with catch. It doesn’t allow for nearly enough flexibility as you are unable to add any additional processing plugins that only affect the parallel compression.
Also, it may be quicker the first time you set it up, but it can make for a slower workflow when changes are needed down the road. Where you would only need to grab a fader on your main mixer to turn the compression up or down, you now need to open the compressor plugin to adjust the mix.
9. Best Parallel Compression Plugins For Vocals
Although a stock digital compressor may work, you often want something with a little more character. Below is a list of some of the top compressor plugins that have a more analogue quality.
- UAD 1176 or Waves CLA-76: Both models of an analogue classic, these FET style compressors have probably been used on more records than anything else.
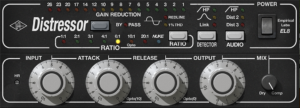
- UAD Distressor or Slate Digital FG-Stress: A model of the analogue Distressor plugin, these are great for getting a more edgy sounding vocal.
- Soundtoys Decapitator: An excellent compression and saturation tool with a pleasing analogue quality to it.
- Soundtoys Devil-Loc: The most aggressive of the compressors on this list, Soundtoys advertises it as an “audio level destroyer. A little goes a very long way with this unique tool.
All of these are all great choices when using parallel compression on vocals. Once again, using a combination of the above is also a great tactic when one just doesn’t seem to do the trick.
Conclusion
Using parallel compression can be an effective way to give your vocals a professional edge but it’s a difficult technique to master.
Use gates, EQ and de essers to remove content you don’t want to be harshly compressed. Finding a workflow that works for you can help you move quickly and stay creative.
When one compressor isn’t doing the trick, try parallel compressing with multiple tools channels. However, be subtle when blending in the compression and remember that a little goes a long way.
With all this in mind you’ll be on the path to getting your vocals to sit in a mix, yet stand out and pull the attention of the listener.
If you’re looking for more tips and tricks on mixing and recording, check out the rest of the Sundown Sessions Blog.

