Mixing lead vocals can be one of the most difficult concepts to grasp for the beginner engineer and indie musician. When I was first starting out I struggled with this and it drove me crazy. No matter how much I treated my vocals I just couldn’t get them to sit properly in the rest of my mix.
Thankfully, after years of trial and error I discovered several tricks and techniques professionals were using to make their vocals sit in a mix without being buried by other elements.
I’ve broken my vocal mixing process into five easy to follow stages. Each aspect creates a minor change to the vocals sound that is not largely noticeable. However, when followed in full these little changes add up and contribute to a professional, great sounding vocal mix.
Stage 1: Mixing Preparation
#1 Start With Great Sounding Vocals
There’s an age old expression “you can’t make a silk purse out of a sow’s ear.” That is to say, if you start work on a project of poor quality, no matter how much work you put in it will never be amazing.
This adage is extremely relevant when it comes to mixing vocals. If the track you were given to mix was recorded poorly and with bad technique, no amount of mixing is going to fix that. If the singer didn’t know the song well when recording, this can be even more detrimental to the track.
Minor pitch and timing issues may be fixable during the post stages. However, major mistakes caused by a singer who’s not into the song can cause issues that aren’t worth trying to solve.
To avoid this, get great vocals from the start. Choose a proper microphone that will match your singers voice and use proper vocal miking technique. Most importantly, get a talented singer who can properly emote the song.
If the recording process is new to you, check out this video of tips that can bring your vocal tracking sessions to the next level.
#2 Edit and Comp Your Vocals Before Mixing
Many don’t realize when starting out that any mix session is only as good as the prep work. This is especially true when it comes to mixing lead vocals as they will be at the forefront of a track.
This means that before you even think about mixing your track, take the time to properly comp and edit everything. Doing so takes time and is not nearly as fun as the mixing part of things. However, putting in time cleaning vocals will give a professional edge to your mix that other indie recordings don’t have.
#3 Fix Tuning Issues
No singer is perfect, and no matter how great your vocalist is they are bound to have at least a few off notes here or there. Whether your singer made many mistakes or a small amount, they will all cause problems when mixing.
The solution is to use a pitch correction software such as Melodyne to pull your lead vocal closer in tune with the rest of the instruments. You can do this across the entire vocal or just in places where the vocals really need it.
Melodyne pic by @hancelthehitman.
Source: https://t.co/YcT82eIQgo pic.twitter.com/rxiRKW9eF9— Celemony Software (@Celemony) September 21, 2018
Melodyne is the industry standard and in my opinion the best vocal plugin for pitch correction.
Pitch correcting a vocal is not really considered a “mixing” aspect. However, you’d be amazed at how much better a vocal will sit in the mix once properly tuned.
Stage Two: Vocal EQ
There is no one size fits all solution when it comes to vocal EQ. However, there are some common things to look out for.
#4 Listen In Context
Before getting into the nitty gritty details of mixing vocals, it’s important to think about the context of the track in the song. That is to say, something that sounds good on an vocal when soloed, may make things worse when mixed with other instruments.
To avoid this issue, make major changes to the vocal EQ with other mix elements in the background. Alternatively you can flip solo on and off on the vocals as you make changes and listen to how it affects everything else.
#5 Mix Everything Else Around The Vocals
The opposite of the above point is that making changes to the other mix elements will also affect the vocals. A big problem many beginner engineers forget is that the lead vocals are the most important aspect of a mix. Because of this they may not bring them in until the end of the process.
This approach can cause unnecessary work down the road for the mixing engineer, who unknowingly buried the voice in other elements. Instead bring in the vocals early on and mix everything around it in a way that enhances the vocals.
A properly mixed track won’t need much done to the lead vocals in order to get them to sit properly.
#6 Remove Problematic Frequencies
Listen to the vocals for areas that may not be needed or are overly present then remove them with a parametric equalizer.
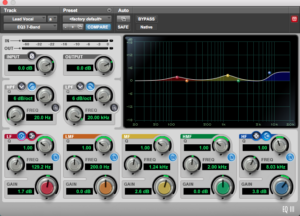
The most basic of these is to use a High Pass Filter to remove unnecessary content in the low end. This could be anywhere between 80Hz – 200Hz depending on the quality of the vocals and the high pass slope.
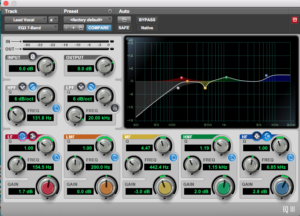
These are some common areas you may cut when mixing vocals with EQ.
Sometimes the vocals may have a boxy ring to them that can be very annoying. Search in the 400Hz – 500Hz area with a bell curve EQ for this content then notch it out.
If you notice the sibilance in a vocal mix causing issues, try notching out some content around 6kHz – 8kHz. Be careful however, as this can deaden the clarity of your vocals.
#7 Enhance Vocal Frequencies
After removing any problem frequencies in a mix, you can boost other aspects to enhance the sound of the vocals. Do so gently at first, using a wide bandwidth and low amount of gain.
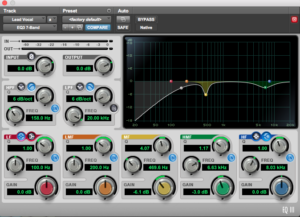
If your in search of a thicker, fuller sound, try boosting in the low end around 100Hz – 250Hz. Things can quickly muddy up in this area so use caution when doing so.
Much of the vocal clarity and unique characteristics lie in and around the 1kHz – 2kHz range. Adding a slight boost in this area can help the vocals to cut through the mix without being overly present.
These are some areas you may want to try boosting to enhance your vocal mix.
Finally using a High Shelf to boost anything above 10kHz can help bring the vocals more forward in the mix. It will also give them a more airy sparkle. Doing so may cause the sibilance in the mix to pop out too much. However, a De Essser can be used to control any issues in this regard. More on this later.
#8 Use a Dynamic Equalizer To Control Presence
A harsher presence in the lead vocals lies in the 2.5kHz – 4.5kHz range. This is integral to helping a lead vocal cut through a mix. However, too much of it can make the vocals sound harsh and unpleasing.
A problem that often occurs when mixing is an increase in this content when the lead vocalist switches registers. Increases in dynamics can also cause this issue, making it difficult to set an appropriate EQ curve for this area.
Because of this I will almost always use a dynamic equalizer when mixing my vocals to control the presence. A dynamic equalizer combines an EQ with a compressor, allowing you to animate specific bands dependant on that contents dynamics.
To utilize this plugin on your vocals, shape an EQ band to your pleasing. Then use the dynamic aspects to keep that content under control throughout the song.
Stage 3: Vocal Compression
#9 Use an Appropriate Attack Time
When compressing lead vocals in a mix, adjusting the attack time can have a major effect on their sound.
If the vocalist has quick dynamics that jump out of the mix, using a fast attack time can help to control this. It can thicken the vocals by bringing out more of the body of words and pulling back consonants.
Use caution with this approach however as a vocal part can quickly lose it’s dynamic edge. It also has a far less transparent sound to it which can hinder a track.
Conversely, a slow attack time will bring out more of the aggression and punch in the vocals. It will have a more transparent sound and do a better job of leveling out the long term dynamics of a vocal.
#10 Release Quick Enough
If your compressor does not have a quick enough release time to return to zero before compressing again, you aren’t really compressing. You will simply be turning the overall level of the vocal down.
Make sure you adjust your release time so that it returns to zero often. This way the compressor will only be clamping down on the aspects of the vocal that jump of the mix.
#11 Use Two Compressors
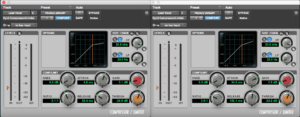
Using two compressors with varying attack and release times is a common approach when mixing vocals.
One of the best ways to create a balanced lead vocal in a mix is to use more than one compressor. Varying attack and release times allow you to compress different aspects of the vocal to varying degrees.
Start with a compressor that has a fast attack and fast-medium release. Use this to compress aspects of the vocal that jump out at the listener every now and then.
Follow that with a more transparent compressor that has a medium attack and medium-slow release. Use this to level out the overall dynamics of the performance.
The combination of these two compressors can give a greater control of the lead vocal mix, not achievable with only one compressor.
#12 Parallel Compression (Use Even More Compressors)
Sometimes over compressing a vocal can have a pleasing quality to it. This is especially true with compressor plugins that model analogue outboard gear.
However, it’s very easy to go overboard with these techniques in a way that deters the quality of the lead vocal.
The solution to this is to use a technique known as parallel compression. This is where you send the lead vocals to a secondary aux track which is then overly compressed.
You can then lightly blend the “squashed” signal with your normal vocals. This can enhance the character of your vocals without being overly present in the main mix.
#13 De Ess Your Vocals
The issue with compression is that it can make quieter sibilance more present in the mix. To counteract these issues use a de esser at the end of your vocal chain to attenuate unwanted sibilance.
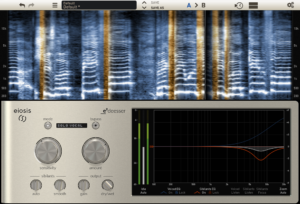
Using a de esser like the the Eiosis e2Deesser is integral to controlling sibilance in a vocal mix.
Properly de essing vocals goes beyond simply placing a de essing plugin on your channel strip and choosing a preset. For a more thorough look on this aspect check out our in depth post on proper vocal de essing.
Stage 4: Adding Space and Depth
#14 Adding Reverb To Lead Vocals
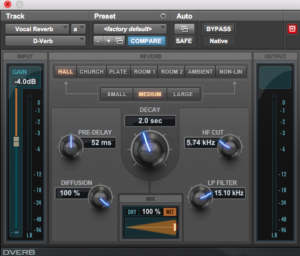
Reverb is the first line of defence when it comes to creating space in a vocal mix. Never insert a reverb plugin directly onto the track. Instead, use an aux send to process the reverb on a separate track.
Here are some basic settings that serve as a starting place for mixing vocals.
The pre-delay is one of the most overlooked settings when it comes to vocal reverb. Using a longer pre-delay will separate the reverb from the vocal. This pushes the reverb back in the mix and brings the vocal forward. This is ideal for lead vocals so always use a pre delay of at least 50ms when mixing them.
Another important aspect is the EQ on a lead vocal’s reverb plugin. Use a low and high cut on the reverb to clean it up and remove unwanted mud or sibilance.
Finally, choose a decay time that’s long enough to enhance the vocals but not so long that it causes one line of a lyrics reverb to overstep the start of the next line.
#15 Using Vocal Delay
Delay on vocals can really add a professional edge to your lead vocals, with many possibilities. It can be however, to know where to start when using these plugins. To make things easy, I’m going to focus on two main types of vocal delay, ping pong and slap-back.
The latter is achieved from a mono delay, with a quick delay time and low amount of feedback. It’s great for thickening a lead vocal and adding a sense of depth to it.
Ping pong delay, uses a stereo delay, with the left and right signals out of time with one another. The timing of this delay will usually follow the tempo of the song, with an eighth note or quarter note rhythm.
Ping pong delays usually have a greater feedback and are an awesome way to spatially spread vocals across the mix.
Stage 5: Automation
#16 Automate Delay Throws
Using delay in a mix can quickly become distracting and make the vocals seem overly busy. To solve this issue, automate your delay send so that more content is sent to the delay at the end of vocal lines.
You can also use this to turn down delay in the beginning of a track, where a thinner production may make the delay unnecessary.
#17 Automate Your Lead Vocal Fader
After everything is done, go through your song and even out the levels of the lead vocal with fader automation.
This means far more than just leveling out the quieter verses with the louder choruses. You can really take your vocals to the next level by automating individual words louder or softer. Another technique is to push of the level at the tail end of a phrase where the singer is running out of dynamic energy.
The struggle is real …. #VocalAutomation pic.twitter.com/ig17HlElJV
— Dj TeeBee (@DjTeeBee) March 4, 2015
Intricate vocal automation takes time but is well worth it in the end.
This can be time consuming but it will work wonders on leveling out the dynamics of a vocal. You’ll quickly notice your vocals sitting in the mix with a professional edge that no amount of compression or dynamic processing can achieve.
Conclusion on Mixing Vocals
If this all seems like it may be a lot, that’s because it is but you shouldn’t get discouraged. As the lead vocals are the focal point of a mix, spending a large amount of time enhancing them will have amazing effects on your song.
The final vocal chain when mixing may be far more complex than you’d first expect.
There are many things to think about in this list, each creating a minor but integral change to the final vocal sound. The more you try these techniques, the quicker it will be come and the better you will get at discerning what’s helping a mix and what’s hindering it.
Hopefully this list of tips and tricks will give your lead vocals the professional edge your mixes have been missing. For more tips on home recording and music production, check out the rest of the Sundown Sessions Blog.

