The kick drum is an integral piece to master when mixing a song. It often serves as the heartbeat that keeps all other elements glued together forward and creates a foundation for the production.
Unfortunately, there are a lot of misconceptions around properly mixing the kick drum and it’s not given nearly enough attention in the mix stage. So, we’ve dedicated this entire post to helping up and coming engineers master professional tricks for getting the kick to sit in a mix.
1. Remove Unnecessary With EQ
The usual approach when using EQ on any instrument is to start by removing unnecessary content before you add anything. Things aren’t any different with kick but there generally shouldn’t be too much that needs to be removed.
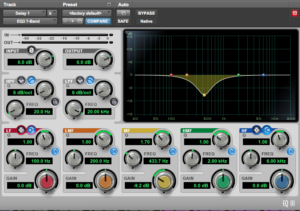
A common area to cause problems is the 400Hz – 500Hz range. This is an area where unnecessary frequency build up can cause a boxy, almost cardboard sound. Cutting it out with an EQ that has a fairly tight bandwidth can help bring out the more pleasing areas.
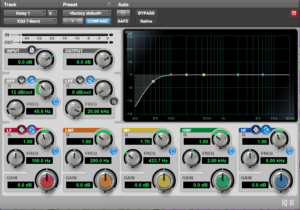
Another area that’s up for debate between engineers is cutting out low end content with a high pass filter. Although, this may seem surprising for a bass heavy instrument, there can still be unnecessary content in the extreme lows.
Placing a high pass filter just before your kick drums first sub-harmonic can do a lot to tighten up the sound of it when mixing. This will usually be no higher than 55hz at the very most. In some situations it won’t work but it’s a useful trick when it does.
2. Enhance With EQ
Once you’ve gone through and removed content that’s hurting the mix, it’s time to enhance the sound of your kick drum. You can shape the kick by adding EQ in areas that are having a positive effect on it’s sound.
The 50-60 Hz range gives thump in a kick drum and boom in a bassline. Too little will result in less weight or depth, but too much will result in a flabby mix#Studiotemplates #musicproductiontips #abletonlive #cubase #flstudio #musicproducer #musicproduction #musicstudio #mixing pic.twitter.com/VAawsd07Ac
— Studiotemplates (@studiotemplates) September 19, 2018
The first area to boost is in the 50Hz – 80Hz range. This area is the sub-harmonics of your kick that are often felt rather than heard. Moving up, the 100Hz-250Hz range where you’ll often find the fundamental frequency of the kick and body of its tone.
Finally the upperange has important content as well. Try searching in and around 3khz-8khz for the actual attack of the beater hitting the skin. Where you boost in this area depends on what style of kick you’re going for. It can really help define it in a dense mix.
The video below is a nice quick crash course in what was just talked about when it comes to mixing kick drum with EQ.
3. Use Compression
Understanding how to use compression when mixing any instrument is difficult and a kick drum is no exception. Your attack and release times are integral to shaping its dynamics with this tool.
Think of each kick drum hit as two separate parts. The first is the initial sound of the beater hitting the skin, followed by the resonant tone of the drum.
If you want to mix the kick drum in a way that has more punch, use an attack time of 20-40ms. This allows the initial attack of the kick to pass through and compresses the resonance. On the other hand setting a quick attack and a release of 20-40ms will clamp down on the beater noise and give the kick more body.
Use your threshold and ratio settings to adjust how much compression you want. A little can go a long way however and I wouldn’t suggest more than 6db of gain reduction max. Check out the video below for some additional tips on using compression when mixing kick drum.
4. Use Triggers
There’s a lot of stigma around using triggers on a drum set. However, done properly a triggered can be extremely transparent and really help your kick drum to sit in a mix.
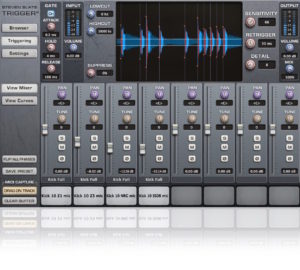
Using software such as Steven Slate’s Trigger is prominent technique in contemporary music production and nothing to be ashamed of. Try to treat the triggered samples as an augmentation of the original kick however and not a replacement.
Don’t use just one trigger sound either. Lightly combine the sound of several distinct samples, each on their own fader to allow you to blend between them. In this way they act almost as an EQ, each bringing out a certain flavour when mixing your kick drum.
5. Mix Your Bass Guitar Properly
Sometimes the thing that may give you the most trouble mixing a kick has nothing to do with the drums. Because the bass and kick operate largely in the same frequency spectrum, they can easily contradict each other.
Always make sure you have a good dynamic balance between the two instruments. You will also want to use EQ to shape the two around one another. If you have a bass guitar with a big boost in the 100hz-200hz range, don’t expect your mix to benefit from boosting the kick in the same area.
You may have to sacrifice part of one instruments frequency content for the other, but don’t be discouraged. These types of sacrifices go unnoticed in a mix as the other instrument fills in the empty space.
6. Proper Mix Buss Compression
A mix buss compressor that’s used wrong can really take away from your kick drums punch and power. Using an extremely fast attack time is often not preferred as it cuts back on the start of any transient elements.
Instead, using an attack time of 10ms-30ms will allow for that initial attack of the kick to go untouched. The compressor can then take care of the non-rhythmic elements and glue the rest of the track together.
7. Properly EQ Your Overheads
A lot of people get to the overheads when mixing and go about it with the wrong approach. Many peoples first attempts involve, using a high pass filter that aggressively cuts out most of the lowend content.
Although, you may not want all of the sub-frequencies, the low end content in the overheads is still integral to the sound of your drums. Because of this I will rarely remove much from the low end allowing for the overheads to augment the sound of the kick even more.
The same applies to room mics, where low end content offers a different, more distant image of the kick drum.
8. No (or Minimal) Reverb
A mistake many beginner engineers make is to send the kick drum through a reverb the same way you would with the snare or overheads. This seems like a logical approach to getting it to sit in the mix with everything else.
However, doing so can actually cause the kick to get easily lost. This is because low frequency content builds up quickly in reverb, making the track “muddy” so to speak.
Some better way to add reverb to your kick and bass.. #mixing #mix #production #bass #kick #reverb pic.twitter.com/Wv1CDYy5Vw
— Frenzo’s_Music (@frenzo131) December 29, 2017
Any reverb that you need on the kick can instead come from the overheads. This will place the kick through reverb along with everything else for a more controlled low end. The method above is also an alternative for mixing reverb with your kick drum.
9. Don’t Just Focus on the Low End
We’ve already briefly touched on this in the section about EQ but your kick is not all about what happens in the low end. A lot of the kick drums presence and content in a mix can be found in the higher register.
Because of this, you don’t always want to mix your kick on bass heavy speakers. Referencing your mixing on monitors with more mid to upper-range content can help you get an even balance of your kick drums content.
Conclusion to Mixing Kick Drum
By now you’ve hopefully realized just how much goes into properly mixing kick drum. Start by removing problem areas with EQ then enhance it. Adding effects like compression is a great choice when used properly but be careful with reverb.
Finally, think about the other areas of your mix that may have a bearing on the kick drum such as the bass guitar, overhead EQ, and upper range content.
If you enjoyed these tips and are looking for more useful advice on the music production industry, check out the Sundown Sessions Blog.

