There’s a ton of misconception around miking drums in a small home studio. When first starting out a lot of people (myself included) have a hard time properly capturing a drum kit in a budget studio. This is largely because everything can be limited including space, microphones and inputs.
Many people think you need a fancy studio with a lot of microphones and high end gear to record drums but this is not the case.
The common belief is that due to the limitations of a beginner home studio, accurate drum sounds cannot be achieved. However, I find that often times these home studio drum recordings fall short due to self taught engineers who have not yet learned some key aspects to properly miking and tracking drums.
After years of successful work in a small home studio, I have a number of tips to share. These techniques will help you achieve excellent results when recording drums, no matter what the space may be.
1. Set Realistic Expectations
Unless you’re recording in a high end studio you probably won’t get the world’s most mind blowing drum sounds. That’s not to say however that you can’t have great sounding drums that play an appropriate role in your song.
It’s important before recording that you have an accurate and realistic idea of how you want your drums to sound.
Keep in mind that most genres of music don’t actually require a big sounding drum kit. Although massive drum tones can be fun to achieve they will definitely distract from a folk or indie rock song.
So, consider the role of your drums in this stage as well, long before any form of miking begins.
2. Listen to Other Songs With Drums You Like
This is an important part of pre-production and once again involves setting proper expectations for the drums you’re trying to record. Listen to some records that have a drum sound similar to what you’re hoping to capture. As you do give some thought as to how this was achieved and what went into the recording process.
If you have the time, do some research into how those drums were recorded. Doing this will give you a better idea of what you’re shooting for as you start miking your drum set.
3. Use an Appropriate Drum Set
If you want the drums on your track to sound big then the logical first step is simply to use big drums. If you try to achieve a massive drum sound using a small kit or one that doesn’t have nice tone to it you won’t achieve the result you want.
Although this may seem obvious, many beginner engineers tend to think miking drums or mixing is most important. In fact, getting something that sounds good at the source is the integral part of any recording. Without this, you’ll find yourself running in circles.
4. When Double Miking Drums Watch For Phase Issues
A major problem that can appear when miking drums with a large number of microphones is phasing issues. This is when the same sound reaches two microphones at different times, canceling out certain frequencies.
It is apparent as a loss in low end and can be prevalent on drums with two microphones on them. An example of this would be phasing issues between your snare top and snare bottom microphones.
To test phasing solo both microphones together and flip the phase switch on one of the channels in and out. You’ll notice that when the phase switch is in one position there will be much more low end content present. Keep the phase switch in this position to get the best sound on your instrument.
4. Measure Your Overheads
I’m not one to break out a ruler and go measurement crazy when miking drums. However, I’ll always use a spare cable or rope to measure the distance of my left and right overheads. When doing so, measure the distance from each overhead to the snare and make sure they are equal.
When miking #drums with a spaced pair use the snare has the center reference to reduce phase problems. #recording #ff pic.twitter.com/56tr2FHzwB
— Artur D’Assumpção (@adassumpcao) January 31, 2014
Centering overheads over the snare may seem strange at first as this drum is off center in the kit layout. However, miking in this way anticipates that the snare drum will be the focal point of your drum recording, panned to the center in the mixing stage.
5. Try Glyn Johns Setup for Miking Drums With Few Mics
Just because you don’t have a large number of microphones doesn’t mean that you can’t accurately capture a drum set. There a number of mic placement methods for miking a drum set with a small number of microphones, however my personal favourite is the Glynn Johns setup.
This microphone setup was developed by Glyn Johns and used for his work with The Who, Led Zeppelin and The Rolling Stones.
Place one microphone directly above your snare drum and a second just to the right of the floor tom. You should point the second microphone across the ride and at the snare drum. Using large diaphragm microphones is best for Glynn Johns setup and should be roughly equal distance from the snare drum.
You can use additional microphones depending on personal preference and microphone availability. If possible, I suggest miking the kick drum, snare drum and hi-hat in that order.
This set up is hard to understand when read so check out this awesome video of the master himself Glyn Johns miking drums using this method.
6. Use 3:1 Rule When Miking Toms
Miking tom drums is not required and often not an option when recording with limited inputs or microphones. If you decided to go this route however, it’s once again important to avoid microphone phasing issues.
The best way to do this with drums is to use the “3:1 Miking Rule”. It suggests that your second microphone should be placed three times the distance from the first microphone that the first microphone is from the source.
For a more in depth explanation check out the video below. Although it is for miking singers, the same applies when working with drums.
This may mean sacrificing the perfect mic placement on a tom but will usually result in a better sound overall due to lowered phase cancellation.
7. Consider Your Players Space
As Glyn Johns mentioned in the video above, rarely does the drummer have space once drum mics are setup. It’s therefore important when miking drums, that your players comfort should be of the utmost importance.
Even more elaborate drum miking…! pic.twitter.com/PxxXWxiIWD
— George Shilling (@George_Shilling) June 12, 2014
Miking drums with too many microphones can actually hinder your players comfort and ability to play well.
Staying out of the drummers way can be difficult when recording with a large number of microphones. Sometimes you need to make sacrifices of placement to allow the musician to play to the best of their ability.
Not only will this result in a better sounding drum take, it’s also important for the safety of your gear. A drum stick can be a lethal weapon to a delicate microphone. The closer the mics are to the drums, the better chance you have of your instrumentalist hitting them mid-drum fill.
8. Use Tight Overheads In a Small Space
A big mistake I used to make when first miking drums was to place overheads as high as possible. Because of this they’d usually be just below the ceiling of my basement studio. I thought I would get a bigger room sound by having them as far away as possible.
However, this is a common misconception with beginner engineers. They don’t consider early reflections from the drums that will be bouncing of the ceiling and into the overheads.
The short amount of time between the direct signal and reflections reaching your overheads them isn’t ideal. It will actually result in your drums sounding as though they are recorded in a smaller space.
Instead place your overheads at the halfway point between the kit and the ceiling. This will give you the longest amount of time between the direct signal and early reflections reaching the microphone. The result will be a bigger sounding room.
9. Don’t Remove Ring From Your Snare
A mistake I made constantly when first miking drums is thinking that my snare was too “ringy”. I would spend time dampening, eqing or moving microphones without realizing the ring on the snare was helping my recording.
On most music you listen to the snare drum has far more resonance than actually perceived in the final mix. The ring usually gets covered up by the other elements that are prevalent in the track.
The ring is in fact what lets the snare drum cut through the mix. A snare may sound better without the ring at first but once all the other layers of production are added you can quickly bury your snare drum.
10. Use Drum Triggers
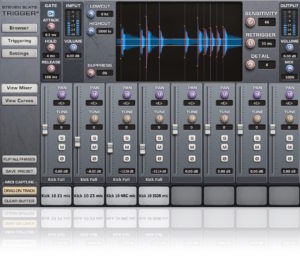
There’s no shame in using a program such as Steven Slate’s Trigger to augment the sound of your drum kit. In fact, this is often the reason commercially recorded drums sound so big and pristine.
Try using multiple triggers on your kick, snare and toms then blend them in with the original for additional character. This results in a powerful drum sound that’s hard to achieve through miking alone.
It’s important to remember that the triggers shouldn’t be used to replace the original drums. A mix of both organic and sampled drums can result in a realistic sound with a commercial edge.
11. Recreate Your Room Sound With Trigger or Impulse Reverb
The tone of the room the drums were recorded in is an important aspect professional drum recordings. But if the room your drums are being tracked in doesn’t sound good there’s not much point in miking it.
Instead trying using an impulse reverb, which is basically a sample of another rooms reverb, to give the sound that the drums were recorded in a higher quality space.
Another method is to use something like Steven Slate’s Trigger on each of your drums with only the room mics of the sample being used.
Conclusion
Although certain styles of music may require a multitude of microphones, this is not often the case. A drum set can be accurately captured with less mics when properly placed. It’s important to maintain realistic expectations when doing so and also to make sure your musician is comfortable.
If you do decide to use a lot of microphones be aware of phasing problems, how to avoid them and experiment to find what works best in your space with your kit.
Remember that as with any artform, engineering takes practice. So, don’t expect your drums to sound amazing the first time you try miking them.
Every time you have a session, listen for problems and try new solutions. Before you know it you’ll have a system in place that allows you to achieve quality drum recordings no matter what type of studio you work in.
If you enjoyed the recording tips in this article, check out the rest of the Sundown Sessions Blog for more home recording tricks and techniques.

