Whether you’re just getting into mixing music or have been working in the industry for years, there’s certain approaches that rarely change. Though simple in concept, not everyone always thinks of these tips when they’re lost in the moment of mixing.
Below is a list of some of our favourite tricks to keep in mind when mixing a song, from start to finish. If you’re a beginner mixing engineer and not sure where to start, work your way in order through the tips in this article, as you mix.
For the more experienced mixing engineer, this list serves a reminder anytime you get stuck. When you work on something for hours and it still doesn’t sound right it’s often something very trivial that you’re missing due to over analysis.
This list of mixing tips will help engineers in both scenarios and really bring your mixing chops to the next level.
Prep
Something that separates the amateur from the pro mixing engineers is taking the time to organize your session, that’s where these next tips will come in handy.
Though it may seem like extra work to go through laying out everything properly, it will save you tons of time in the long run. The last thing you want when you’re feeling inspired is to waste time navigating a messy session.
1. Order Your Tracks
Come up with an order that you like having your tracks in and stick with it throughout all of your mixing sessions.
Some choose to have drums at the start, followed by bass and up in order of the instruments range. Others prefer the reverse and some choose and order entirely unique to them.
It really doesn’t matter as long as it makes sense to you. The point of this tip is so that whatever you’re mixing, you’ll know exactly where to find things when making changes.
2. Colour Your Tracks
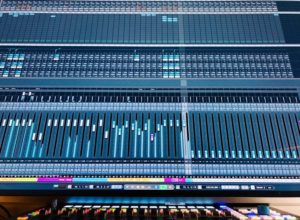
The bigger a session gets, the harder it can be to differentiate between tracks without looking at track names. This can be an issue even if you have everything in a common order.
Thankfully, most DAWs feature a track colouration option which is the best solution to this problem.
By using different colours for different instruments or track types, your eyes won’t get lost amongst otherwise identical tracks. You’ll be able to move much more productively once everything is coloured and in order.
3. Use Busses
Organizing your channels through busses will aid in making quick changes to levels or effects processing.
For example, routing all of the drum mics through a stereo bus will allow you to quickly pull down the level of them all, if need be. Another example would be routing both microphones on a stereo guitar through a buss, allowing you to process both with the same EQ, compression, or any other plugin, easily.
4. Consolidate Clips
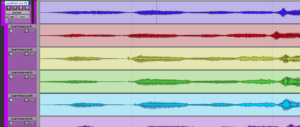
If you’ve spent a lot of time editing or comping tracks chances are you’ll have a session that’s full of cut up clips.
This can cause a couple problems in the mix stage. The first is that having a bunch of separate clips can run you the risk of accidentally moving a clip without realizing it.
Second, depending on your computer, having hundreds of individual clips may slow it down.
Our tip to get around these issues is to consolidate all audio regions before mixing. That is to select all individual clips in one track and merge them into a single big clip.
Just make sure you’re happy with the editing and comping you’ve done before you commit!
5. Save and Use A Session Template
After you’ve mixed some songs and played around in your DAW a fair bit, you’ll start to notice consistencies in your approach to mixing certain instruments.
This is a good time to build a mix template that you can recall no matter what you’re mixing. In it you can have tracks with your go to plugins for any instrument or scenario you may come across.
Then, when it comes time to mix a track import the session data for the necessary tracks and you’ll already be way ahead of where you’d be if you started from a blank slate.
Check out the video below for a more in depth look at using session templates in Pro Tools:
7. Get A Good Mix Without Any Processing First
Beginner engineers are quick to start processing things with effects before they even have a proper balance between everything.
They’ll try using loads of EQ, compression, etc. in an attempt to hear an element that may only need to be turned up.
To avoid this hassle, the best practice is to spend time when you first sit down with a mix getting proper levels. Balance out all the elements in a way that sounds cohesive throughout before you even reach for an EQ or compressor.
Following this tip will help make the rest of the mixing process much easier and straightforward.
EQ
The equalizer (EQ) is what shapes the tonal characteristics of an element. It allows you to turn specific frequencies up or down to better sit with the other elements of a mix.
The tips below will help you properly approach an equalizer no matter what you’re mixing.
6. Use a High Pass Filter
One of the most basic mixing tips that can have a huge effect on your music is to use high pass filter (HPF).
This EQ tool cuts out all content below a specified frequency. It’s important because even if you can’t hear it, all tracks have something going on down there.
Unless it’s an instrument producing low-end content, stuff in that range is noise, rumble or sub-harmonics. All of which just harm you’re track and make things muddier.
By using a HPF you’re freeing up the low end for instruments that actually need it such as bass or kick drum. You’re also not working your speakers as hard as they try to reproduce inaudible content, resulting in a better sounding mix.
7. Boost Narrow, Cut Wide
This is a very general tip when it comes to mixing something with EQ. It ensures that any changes are as transparent as possible
When using EQ in a subtractive manner (to remove content), use a very narrow bandwidth. By doing this you can make a big cut without affecting much of the sound.
On the other hand, if you want frequencies that are being boosted to seem as natural as possible, this can be achieved by using a wide bandwidth.
Although there is no one size fits all solution for EQ bandwidth, this method is an awesome starting place.
8. Remove Problems Then Enhance
There’s no point in adding more frequency content to a problematic signal. Instead try to clean up an instrument and remove problematic areas first.
Once things having been fixed in this manner, you’ll have a better idea of what’s needed to improve the sound. You can then use additive EQ to enhance the signal as you see fit.
9. EQ First
Once again, this mixing tip isn’t the only way to mix a track. However, it’s often the most ideal place to begin.
Once you get a general mix going with levels, add the EQ before any compression or other effect processor.
The EQ is what really shapes the tone of how an instrument sounds. If you don’t EQ until the end of your effects chain, every other plugin such as a compressor, chorus etc. will be reacting to the wrong tonal characteristics.
10. Less Is More
More often than not, you don’t want the listener to hear the effect of an EQ being used. It’s there to nudge already great elements into a more cohesive sound.
The best tip for achieving this when mixing is to use broad EQ strokes that gently affect a signal. Minute but calculated changes can have a huge affect on everything.
Compression
Compression will affect the dynamic elements of a mix and can really help to make everything sit in place properly.
It’s a tricky tool to get the hang of when you first start mixing as the contrast shouldn’t be very apparent. However, the tips below will point you in the right direction of what to listen for when mixing.
11. Attack and Release Are The Key
Although all the settings on a compressor are integral, the attack and release are what really shape it’s sound.
Use a medium to long attack of about 30ms or above and the compressor will allow the initial attack of an instrument to pass through unaffected. This results in a more rhythmic sound and is great if that is the purpose of the instrument.
On the other hand using an immediate attack, with a release of around 30 – 50ms will pull back the rhythmic elements and bring forward the harmonic aspects of an instrument.
The video below is an awesome resource on properly using attack and release times:
12. Parallel Compression
If you can’t quite get the sound you want out of your vocal compression, try using parallel compression. This is when you heavily compress the same signal on a seperate track allowing you to blend between the two.
It’s an awesome technique to use on things that need to be up front and center in a mix with out the effect being too noticeable.
13. Don’t Over Compress
Compression is a dangerous tool as it’s very easy to quickly have too much of a good thing. When starting out you should see the compressor working but not really hear its effects prominently.
Also, always make sure you’re release time is set so that the needle keeps returning to zero at points. Otherwise you aren’t compressing the signal, you’re just turning the whole thing down.
Adding Space
Once you’ve got all the elements sitting together well, it’s time to add some space and depth to your mix.
This is where a mix can really come to life. However, if you’ve done the past mixing tips poorly it can show here. So, make sure you take your time and don’t just jump right to this stage.
14. Panning
This may seem like an obvious tip for adding space when mixing but it’s more integral than you’d think. If one element is masking another too much, a slight shift left or right can go a long way in making new things stand out.
Many engineers stress the importance of making sure a mix translates well in mono. With that in mind make sure you don’t rely on panning as a primary mixing tool. Instead think of it as a placement tool for times listeners have a stereo set up.
At the same time, accept the fact that your mix will never sound perfect or identical in both scenarios. When cutting losses, I always opt for the option that benefits a stereo set up as that is the most common nowadays.
15. Use Reverb
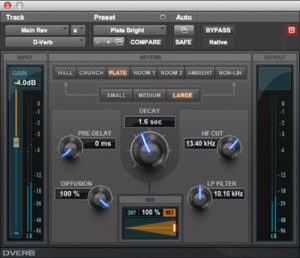
Reverb is the key to giving a recording a sense of depth and really placing everything in a cohesive environment.
Always send your tracks to a reverb buss rather than place reverb on every single track. This allows you to send multiple instruments to the same reverb giving things a consistent sound.
16. Delay
There are plenty of types of delays that affect the way instruments are perceived in a mix. Short delays like tape delays do an awesome job of hugging the vocals.
On the other hand a long ping-pong delay can spread the image of the vocals wider and in a dense mix.
My favourite utility delay is EchoBoy by Soundtoys. The video below is a great intro into all the sounds EchoBoy is capable of:
Check out this awesome article from Musician On A Mission for a more in depth look at using reverb and delay to shape your mix.
Conclusion
What you do in the mix prep stage is just as important as every other aspect of a mix. Take the time to clean and organize things early on and you’ll notice a big improvement in your mixes.
After that, add EQ, remembering the importance of a HPF and using techniques that keep your changes as transparent as possible.
After the EQ comes some compression but don’t overdo it. If you have to, try using parallel compression to subtly blend in an aggressive compression with the dry signal.
Finally, use tools such as reverb, delay and panning to add a sense of space to your mix.
Although these tips may seem trivial to the experienced engineer they are integral to proper mixing. Remembering to apply them to your work will make a massive difference not only in sound but in your work ethic.
If you liked the tips in this article be sure to check out the rest of the Sundown Sessions Blog for more tips and tricks on home recording and mixing music.

